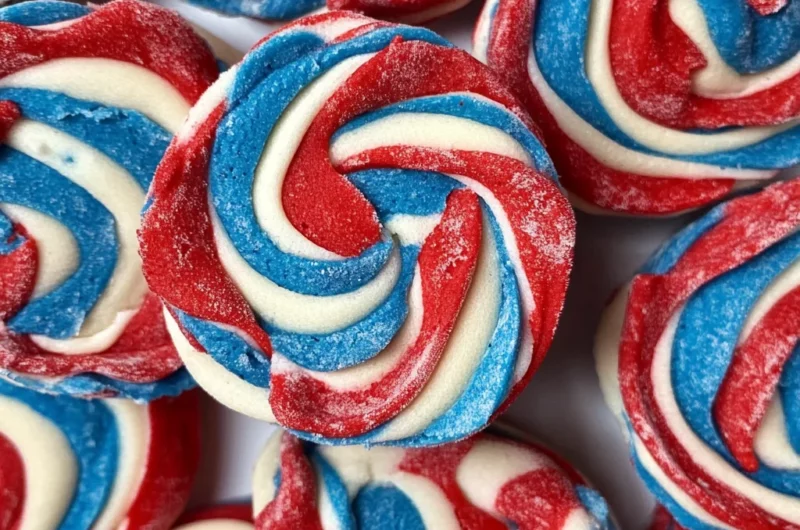
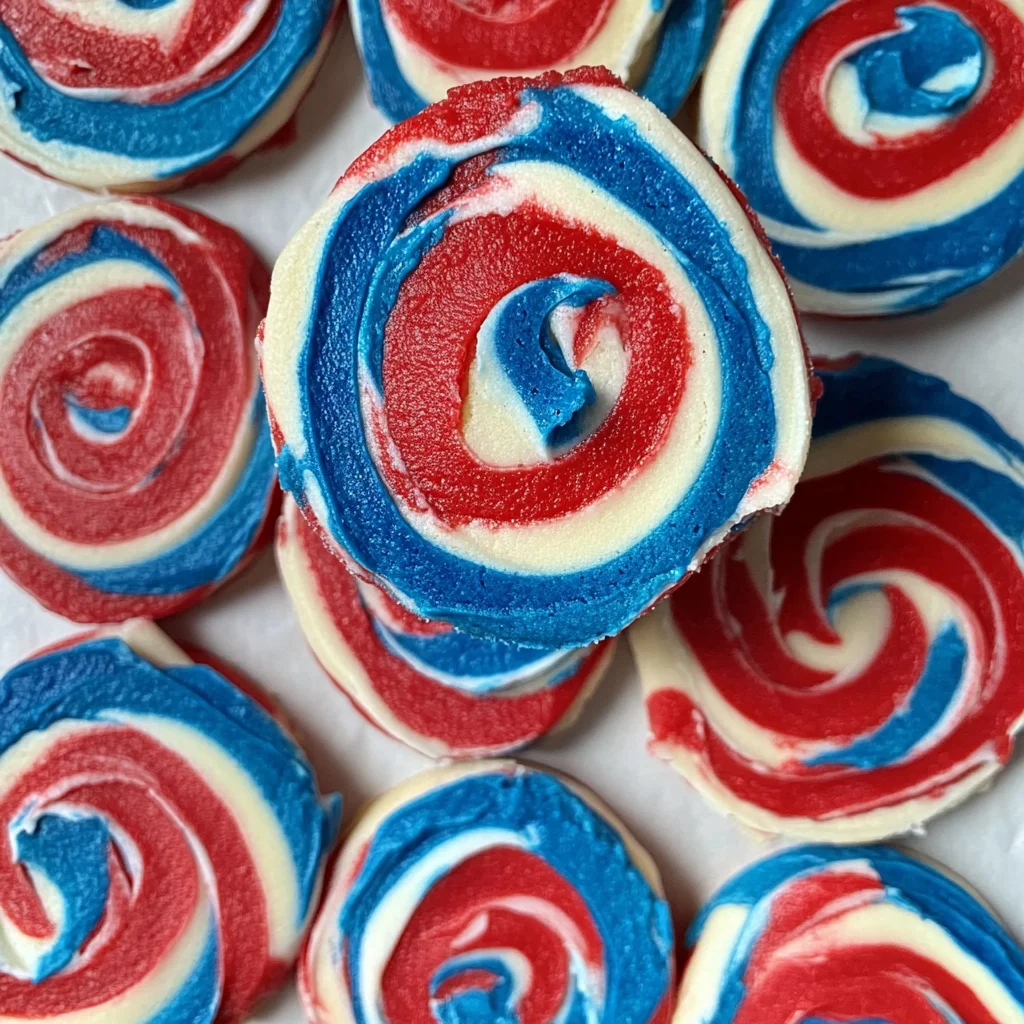
Serve up a sweet finale at your 4th of July feast with soft and chewy Red, White and Blue Pinwheel Icebox Cookies. These vibrant cookies are not only visually stunning but also packed with flavor. They are perfect for holiday gatherings, barbecues, or any festive occasion. The unique pinwheel design gives these treats an artistic touch that will impress your guests and family alike.
Why You’ll Love This Recipe
- Festive Appearance: The striking colors of red, white, and blue make these cookies a showstopper for any celebration.
- Easy to Make: With straightforward instructions, you can whip these up even if you’re a beginner in the kitchen.
- Customizable Flavors: Feel free to experiment with different food coloring or even flavors to create your own unique version.
- Perfect for Sharing: With 48 cookies in this recipe, they’re great for parties or as gifts for friends and neighbors.
- Soft and Chewy Texture: Enjoy the delightful consistency that melts in your mouth with every bite.
Tools and Preparation
Before you dive into making these delicious cookies, gather your tools and ensure you have everything ready. This makes the baking process smoother and more enjoyable.
Essential Tools and Equipment
- Stand mixer
- Mixing bowls
- Plastic wrap
- Wax paper
- Parchment paper
- Baking sheets
Importance of Each Tool
- Stand mixer: This tool saves time and effort when creaming butter and sugar together.
- Plastic wrap: Essential for keeping your dough fresh while it chills in the refrigerator.
- Parchment paper: Prevents cookies from sticking to the baking sheets, ensuring easy removal.
Ingredients
To make the delightful Red, White and Blue Pinwheel Icebox Cookies, you will need:
- 3 cups all-purpose flour
- 1/2 teaspoon baking powder
- 1/2 teaspoon salt
- 1 cup (2 sticks) unsalted butter
- 1 1/3 cups sugar
- 2 large eggs
- 2 teaspoons vanilla extract
- Red food coloring
- Blue food coloring
How to Make Red, White and Blue Pinwheel Icebox Cookies
Step 1: Sift Dry Ingredients
In a medium bowl, sift together the flour, baking powder, and salt. This ensures that there are no lumps and helps incorporate air into the flour.
Step 2: Cream Butter and Sugar
In the bowl of a stand mixer fitted with the paddle attachment:
1. Beat the unsalted butter until smooth (about 2 minutes).
2. Add in the sugar, continuing to beat until light and fluffy (about 3 minutes).
3. Add the eggs, one at a time, beating between each addition.
4. Mix in the vanilla extract.
Step 3: Combine Wet and Dry Ingredients
Turn off the mixer. Gradually add the sifted dry ingredients to the butter mixture. Beat just until combined.
Step 4: Divide Dough
Remove the dough from the bowl and divide it into three equal pieces:
1. Shape one piece into a 4-by-4-inch square for the white portion of cookies.
2. Wrap it securely in plastic wrap.
3. Place it in the fridge.
Step 5: Color Dough Red
Return one dough piece to the stand mixer:
1. With mixer on low, add red food coloring until desired color is reached.
2. Shape this into another square, wrap it in plastic wrap, and refrigerate.
Step 6: Color Dough Blue
Repeat step five with blue food coloring for the final piece of dough.
Step 7: Chill Dough
Refrigerate all three pieces of dough for about 30 minutes.
Step 8: Roll Out Dough
Remove dough from fridge:
1. Cut each square in half to form rectangles.
2. Roll out red dough between wax paper into a rectangle about 1/8-inch thick.
3. Repeat with white and blue dough.
Step 9: Layer Doughs Together
Stack them by peeling off wax paper:
1. Place white on red,
2. Then blue on top,
3. Lightly roll together.
Step 10: Form Logs
Starting from a short end:
1. Roll tightly into a log,
2. Repeat with remaining dough,
3. Wrap logs in wax paper then plastic wrap,
4. Refrigerate for 1 hour.
Step 11: Final Chill
Roll logs on counter or stand them up in glasses to avoid flat sides:
Refrigerate again for at least four hours.
Step 12: Preheat Oven
When ready to bake:
1. Preheat oven to 350ºF,
2. Line two baking sheets with parchment paper,
3. Remove logs from fridge,
4. Slice each log into 1/4-inch rounds,
5. Place rounds about 2 inches apart on sheets.
Step 13: Bake Cookies
Bake for about 9 to 11 minutes until pale golden:
Once done, transfer cookies to a wire rack to cool completely.
Now you’re all set! Enjoy these festive treats at your next gathering or as a sweet surprise anytime!
How to Serve Red, White and Blue Pinwheel Icebox Cookies
These festive cookies are perfect for any summer gathering or holiday celebration. Here are some delightful serving suggestions to elevate your experience with Red, White and Blue Pinwheel Icebox Cookies.
On a Decorative Platter
- Arrange the cookies on a colorful platter for an eye-catching presentation.
- Add fresh berries around the cookies for a pop of color and freshness.
With Ice Cream
- Pair the cookies with a scoop of vanilla or strawberry ice cream for an extra treat.
- Drizzle with chocolate sauce or sprinkles for added fun.
As Party Favors
- Wrap individual cookies in cellophane bags tied with red, white, and blue ribbons.
- Hand them out as sweet thank-you gifts at your next BBQ or picnic.
Alongside Fresh Fruit
- Serve the cookies with a side of seasonal fruit like watermelon, strawberries, and blueberries.
- The sweet contrast enhances the festive spirit of your dessert table.
With Coffee or Tea
- Offer these cookies alongside coffee or iced tea for a relaxing afternoon treat.
- Consider flavored teas like hibiscus or berry blends that complement the cookie’s sweetness.
At a Potluck
- Bring a batch to share at potlucks; they are sure to be a crowd-pleaser.
- Pair with whipped cream or yogurt dip for an added touch.
How to Perfect Red, White and Blue Pinwheel Icebox Cookies
Making perfect Red, White and Blue Pinwheel Icebox Cookies can be easy with these helpful tips. Follow these suggestions to ensure your cookies turn out beautifully every time.
- Chill the Dough: Make sure to refrigerate the dough adequately. This helps maintain shape while rolling and baking.
- Use Quality Ingredients: Opt for high-quality butter and vanilla extract. It enhances the overall flavor significantly.
- Roll Evenly: When rolling out dough, aim for uniform thickness. This ensures even baking and consistent texture.
- Sharp Knife: Use a sharp knife when slicing the logs. A clean cut will keep each pinwheel intact without squishing them.
- Baking Sheet Prep: Line baking sheets with parchment paper. It prevents sticking and makes cleanup easier.
- Watch Baking Time: Keep an eye on your cookies while baking. They should be pale golden but not overbaked to retain chewiness.
Best Side Dishes for Red, White and Blue Pinwheel Icebox Cookies
Pairing side dishes with your festive cookies can create a balanced menu perfect for celebrations. Here are some delightful options to consider.
- Fruit Salad: A mix of seasonal fruits adds freshness and complements the sweet flavors of the cookies.
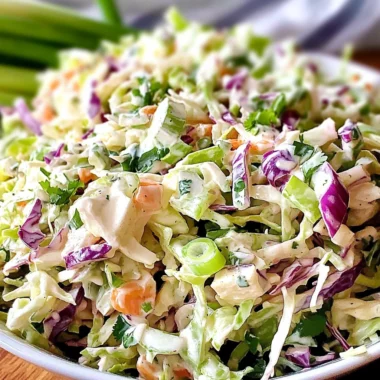
- Coleslaw: A tangy coleslaw can provide a crunchy contrast that balances out dessert sweetness nicely.
- Grilled Corn on the Cob: Sweet grilled corn offers a smoky flavor that pairs well with soft cookies.
- Caprese Skewers: These skewers combine mozzarella, tomatoes, and basil for a fresh appetizer that’s easy to eat.
- Pasta Salad: A light pasta salad with vinaigrette dressing keeps things refreshing without overwhelming flavors.
- Veggie Platter: Crisp veggies served with hummus create balance on your platter while offering healthy options.
- Cheese Board: A selection of cheeses with nuts can serve as a savory complement to sweet treats like cookies.
- Potato Salad: Creamy potato salad is classic at summer gatherings, providing hearty satisfaction alongside sweets.
Common Mistakes to Avoid
Making Red, White and Blue Pinwheel Icebox Cookies can be fun, but there are some common mistakes to watch out for.
- Skipping the chilling step: This step is crucial for firming up the dough. If you skip it, your cookies may spread too much while baking.
- Not measuring flour correctly: Use the spoon-and-level method to avoid adding too much flour, which can result in dry cookies.
- Overmixing the dough: Mixing too much can make the cookies tough. Mix just until combined for a soft texture.
- Ignoring oven temperature: Always preheat your oven. Baking at the wrong temperature can lead to unevenly baked cookies.
- Cutting uneven slices: Ensure that slices of the logs are uniform for even baking. Use a sharp knife for clean cuts.
Refrigerator Storage
- Store the cookies in an airtight container in the refrigerator.
- They will stay fresh for up to one week.
Freezing Red, White and Blue Pinwheel Icebox Cookies
- Wrap each cookie tightly in plastic wrap or aluminum foil before placing them in a freezer-safe bag.
- They can be frozen for up to three months.
Reheating Red, White and Blue Pinwheel Icebox Cookies
- Oven: Preheat to 350ºF and place cookies on a baking sheet for about 5 minutes.
- Microwave: Heat individual cookies in 10-second intervals until warm.
- Stovetop: Use a skillet on low heat, placing a lid over it to trap steam and warm the cookies evenly.
Frequently Asked Questions
How do I make Red, White and Blue Pinwheel Icebox Cookies?
To make these festive cookies, combine butter, sugar, eggs, and flour. After creating colored layers of dough, roll them together and chill before slicing.
Can I customize the colors in Red, White and Blue Pinwheel Icebox Cookies?
Absolutely! You can use different food colorings or even natural dyes to create various colors for different occasions.
How long do Red, White and Blue Pinwheel Icebox Cookies last?
These cookies can be stored in an airtight container in the refrigerator for up to one week or frozen for up to three months.
What should I do if my dough is crumbly?
If your dough feels crumbly after mixing, consider adding a teaspoon of milk or water until it holds together better.
Final Thoughts
Red, White and Blue Pinwheel Icebox Cookies are not only delightful treats but also versatile enough for any celebration. You can customize them with different colors or flavors to fit various occasions. Give this recipe a try; it’s sure to impress family and friends!
Red, White and Blue Pinwheel Icebox Cookies

Serve up a festive treat with Red, White and Blue Pinwheel Icebox Cookies that are perfect for your 4th of July celebrations or any summer gathering. These vibrant cookies feature a delightful combination of flavors and a visually stunning pinwheel design that is sure to impress your guests. With their soft, chewy texture and customizable colors, these cookies are not only easy to make but also a fun activity for bakers of all skill levels. Whether you’re hosting a barbecue or looking for a sweet gift, these eye-catching treats will be the highlight of any dessert table.
- Prep Time: 30 minutes
- Cook Time: 11 minutes
- Total Time: 41 minutes
- Yield: Approximately 48 cookies 1x
- Category: Dessert
- Method: Baking
- Cuisine: American
Ingredients
- 3 cups all-purpose flour
- 1/2 teaspoon baking powder
- 1/2 teaspoon salt
- 1 cup (2 sticks) unsalted butter
- 1 1/3 cups sugar
- 2 large eggs
- 2 teaspoons vanilla extract
- Red food coloring
- Blue food coloring
Instructions
- Sift flour, baking powder, and salt into a bowl.
- In a stand mixer, cream butter and sugar until light. Add eggs and vanilla.
- Gradually mix in dry ingredients until combined.
- Divide dough into three parts; color one red, one blue, and leave one white.
- Chill colored doughs for 30 minutes, then roll out each into rectangles.
- Layer the doughs together and roll tightly into logs; refrigerate for at least four hours.
- Preheat oven to 350ºF, slice logs into rounds, and bake for about 9-11 minutes.
Nutrition
- Serving Size: 1 cookie (18g)
- Calories: 80
- Sugar: 4g
- Sodium: 25mg
- Fat: 4g
- Saturated Fat: 2g
- Unsaturated Fat: 2g
- Trans Fat: 0g
- Carbohydrates: 10g
- Fiber: <1g
- Protein: <1g
- Cholesterol: 15mg