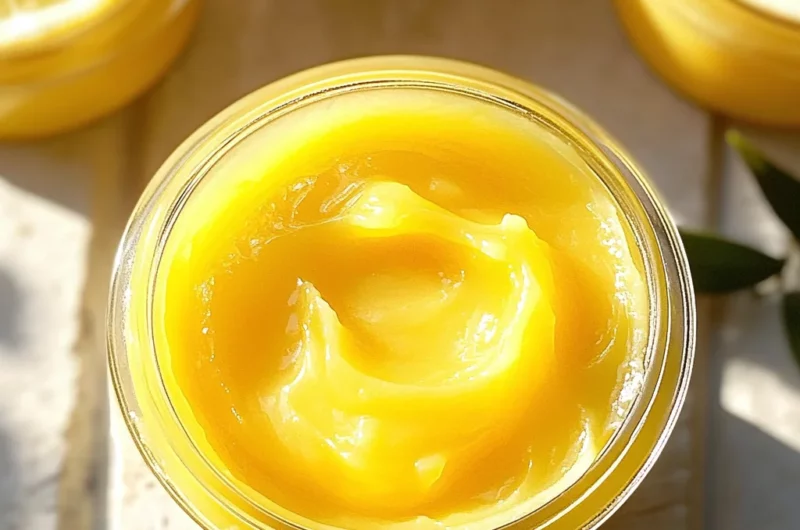
Easy recipe for Homemade Lemon Curd! Whip up this classic filling in just a few minutes. The tangy citrus flavor and buttery richness will wow you! Perfect for breakfast, brunch, or dessert, this lemon curd can elevate your dishes with its delightful taste and creamy texture.
Why You’ll Love This Recipe
- Quick Preparation: This recipe takes only 20 minutes from start to finish, making it easy even for beginners.
- Versatile Uses: Use homemade lemon curd as a topping, filling, or even in desserts like tarts and cakes.
- Fresh Flavor: The bright citrus flavor of freshly squeezed lemons will make this curd stand out from store-bought options.
- Rich Texture: The buttery richness balances the tartness, creating a delightful experience in every bite.
Tools and Preparation
Before you start making your homemade lemon curd, gather your tools. Having everything ready will help streamline the process.
Essential Tools and Equipment
- Medium mixing bowl
- Whisk
- Pot (for double boiler)
- Fine mesh strainer
- Heat-safe bowl
Importance of Each Tool
- Medium mixing bowl: Essential for combining ingredients smoothly before cooking.
- Fine mesh strainer: Helps achieve a silky texture by removing any lumps or bits of cooked egg.
Ingredients
Homemade lemon curd is simple to make with just a few key ingredients that create an amazing flavor profile.
For the Curd
- 3 eggs (large)
- 3 egg yolks (large)
- 1/2 cup granulated sugar
- 1/2 cup lemon juice (juice of 2 lemons)
- 1/2 cup unsalted butter (1 stick), cut into small pieces
How to Make Homemade Lemon Curd
Step 1: Combine Ingredients
Place the eggs, yolks, sugar, and lemon juice in a medium mixing bowl and whisk to combine until smooth.
Step 2: Set Up Double Boiler
Place the bowl over a pot of simmering water. Ensure the bottom of the bowl does not touch the water to prevent cooking the eggs directly.
Step 3: Add Butter and Cook
Add the butter pieces to the mixture. Cook while whisking continuously until thickened. The mixture should be about the consistency of yogurt and will thicken further as it cools.
Step 4: Strain the Mixture
Place a fine mesh strainer over a heat-safe bowl. Pour the thickened mixture through to remove any lumps.
Step 5: Cool Down
Press waxed paper or plastic wrap directly onto the surface of the curd to prevent a skin from forming. Refrigerate until cool.
With these steps, you’ll have delicious homemade lemon curd ready to enhance your favorite dishes! Enjoy this delightful treat that adds zest and creaminess wherever it’s used.
How to Serve Homemade Lemon Curd
Homemade lemon curd is a versatile treat that can elevate many dishes. Whether you’re enjoying it as a spread or a filling, there are countless ways to savor its tangy sweetness.
As a Spread
- Toast: Slather lemon curd on warm toast for a bright breakfast.
- Scones: Pair with freshly baked scones for a delightful afternoon tea.
- Pancakes: Use as a topping for fluffy pancakes to add a citrus twist.
In Desserts
- Tarts: Fill tart shells with homemade lemon curd for an elegant dessert.
- Parfaits: Layer lemon curd with yogurt and granola for a refreshing parfait.
- Cheesecakes: Incorporate into cheesecake recipes for added flavor.
With Fruit
- Berries: Serve lemon curd alongside fresh berries for a simple, delicious treat.
- Ice Cream: Drizzle over vanilla ice cream for an instant gourmet dessert.
As a Dip
- Fruit Skewers: Use lemon curd as a dip for fruit skewers at parties.
- Cookies: Serve with shortbread cookies for an indulgent snack.
How to Perfect Homemade Lemon Curd
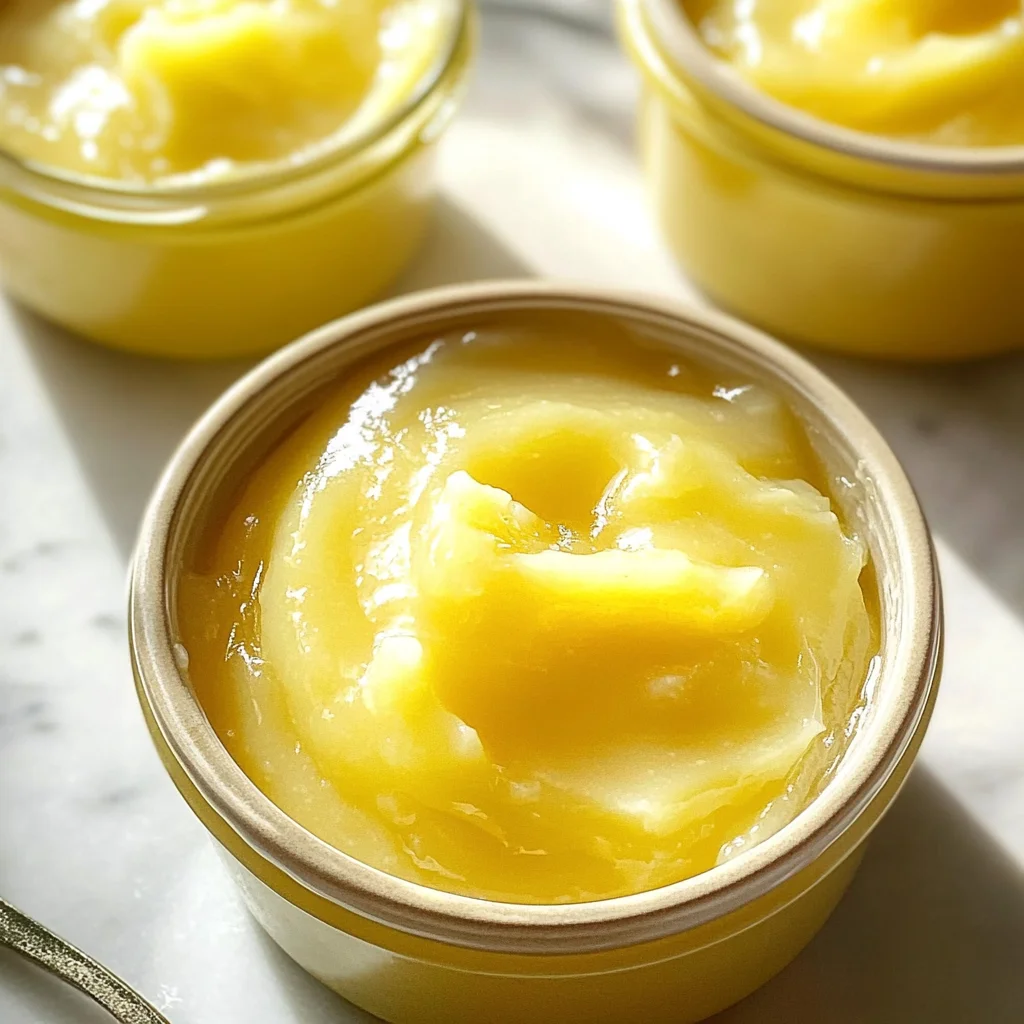
Creating the perfect homemade lemon curd requires attention to detail. Here are some tips to ensure your curd turns out creamy and flavorful.
- Use fresh lemons: Freshly squeezed lemon juice enhances the flavor significantly.
- Whisk continuously: This prevents the eggs from scrambling and ensures smooth consistency.
- Strain the mixture: Straining removes any bits of cooked egg, giving you a silky texture.
- Cool properly: Allow the curd to cool completely before refrigerating to achieve the right thickness.
- Store correctly: Keep in an airtight container in the fridge to maintain freshness.
Best Side Dishes for Homemade Lemon Curd
Serving homemade lemon curd alongside complementary dishes can create an unforgettable meal. Here are some excellent side dish ideas:
- Shortbread Cookies: Buttery shortbread pairs beautifully with the tartness of lemon curd.
- Greek Yogurt: A dollop of Greek yogurt balances out the sweetness and adds creaminess.
- Fruit Salad: A mix of seasonal fruits offsets the tang of the curd perfectly.
- Chia Seed Pudding: Serve this pudding topped with lemon curd for added flavor and texture.
- Cheese Platter: Offer various cheeses that contrast well with lemon’s brightness, like brie or goat cheese.
- Meringue Kisses: Light and airy meringues complement the rich texture of homemade lemon curd.
Common Mistakes to Avoid
Making Homemade Lemon Curd can be simple, but a few common mistakes can affect the final result. Here are some tips to ensure your curd turns out perfectly.
- Not whisking enough: A common mistake is not whisking continuously while cooking. This can lead to scrambled eggs. Make sure to whisk constantly for a smooth texture.
- Using low-quality ingredients: Using poor quality lemons or butter can diminish flavor. Always use fresh lemons and high-quality unsalted butter for the best taste.
- Overcooking the mixture: It’s easy to overcook lemon curd, which can make it grainy. Cook just until it thickens; remember it will continue to thicken as it cools.
- Skipping straining: Failing to strain the curd means you may end up with lumps. Always strain your mixture to achieve that silky texture.
- Not covering properly during storage: If you don’t cover the curd while cooling, a skin can form on top. Press waxed paper or plastic wrap directly onto the surface before refrigerating.
Refrigerator Storage
- Store in an airtight container for up to 1 week.
- Allow homemade lemon curd to cool completely before sealing.
Freezing Homemade Lemon Curd
- Freeze in an airtight container for up to 3 months.
- Leave space at the top of the container for expansion when freezing.
Reheating Homemade Lemon Curd
- Oven: Preheat to low heat and warm in an oven-safe dish until just warmed through.
- Microwave: Heat in short intervals (15-20 seconds), stirring in between until reached desired temperature.
- Stovetop: Gently reheat over low heat, stirring constantly until warmed.
Frequently Asked Questions
How do I know when my Homemade Lemon Curd is done?
The curd is done when it thickens and coats the back of a spoon. It should have a yogurt-like consistency.
Can I make Homemade Lemon Curd with other citrus fruits?
Yes! You can substitute lemons with limes or oranges for different flavors, but keep similar ratios.
How long will Homemade Lemon Curd last?
Properly stored in the refrigerator, homemade lemon curd will last about one week.
What recipes can I use Homemade Lemon Curd in?
You can use it as a filling for tarts, spread on toast, or as a topping for pancakes and desserts.
Can I adjust the sweetness of my Homemade Lemon Curd?
Absolutely! If you prefer a sweeter curd, simply add more sugar according to your taste preferences.
Final Thoughts
Homemade Lemon Curd is a delightful treat that adds zest and richness to various dishes. Its versatility allows you to customize flavors or use it in many recipes from breakfast to dessert. Try making this simple recipe today and enjoy its deliciousness!
Homemade Lemon Curd
Elevate your culinary creations with this easy and irresistible homemade lemon curd! This delightful citrus spread combines the tangy brightness of fresh lemons with the creamy richness of butter, making it an ideal addition to breakfast, brunch, or dessert.
- Prep Time: 10 minutes
- Cook Time: 10 minutes
- Total Time: 20 minutes
- Yield: Approximately 1 cup (16 servings) 1x
- Category: Dessert
- Method: Double Boiler
- Cuisine: American
Ingredients
- 3 large eggs
- 3 large egg yolks
- 1/2 cup granulated sugar
- 1/2 cup freshly squeezed lemon juice (from about 2 lemons)
- 1/2 cup unsalted butter, cut into small pieces
Instructions
- In a medium mixing bowl, whisk together the eggs, egg yolks, sugar, and lemon juice until smooth.
- Set up a double boiler by placing the bowl over simmering water without letting it touch the water.
- Add the butter pieces to the mixture and continuously whisk until thickened to a yogurt-like consistency.
- Strain the mixture through a fine mesh strainer into a heat-safe bowl to remove lumps.
- Cover with waxed paper or plastic wrap directly on the surface to prevent skin formation and refrigerate until cool.
Nutrition
- Serving Size: 1 tablespoon (15g)
- Calories: 60
- Sugar: 6g
- Sodium: 10mg
- Fat: 5g
- Saturated Fat: 3g
- Unsaturated Fat: 2g
- Trans Fat: 0g
- Carbohydrates: 6g
- Fiber: 0g
- Protein: 1g
- Cholesterol: 55mg