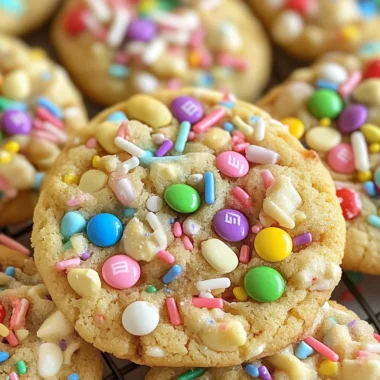
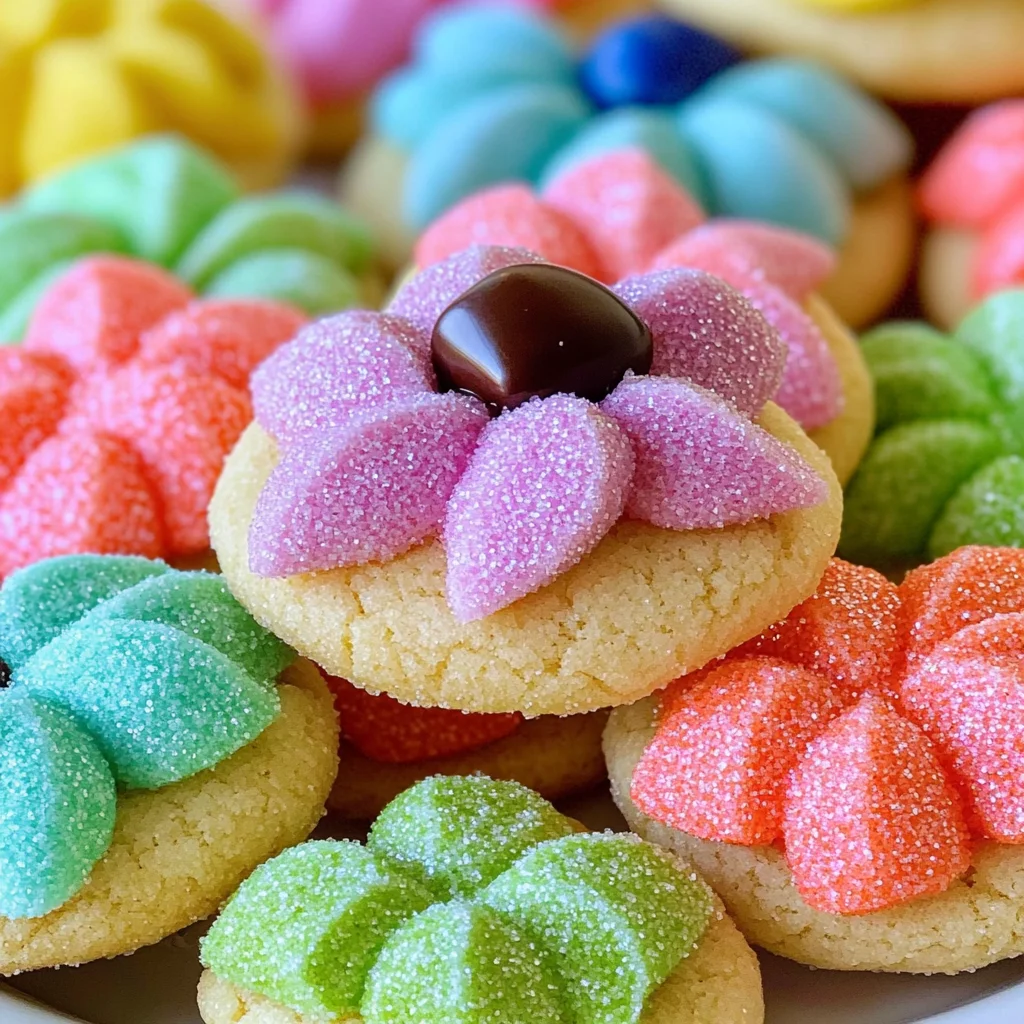
Spring Blossom Cookies are the perfect treat to celebrate the vibrant colors of spring. These delightful cookies are soft, chewy, and topped with a sweet Hershey Kiss, making them ideal for Easter, birthdays, or any cheerful occasion. With their bright colored sanding sugar and simple preparation, these cookies will bring joy to your table and smiles to everyone who enjoys them.
Why You’ll Love This Recipe
- Quick Preparation: With just 10 minutes of prep time, you can whip up these cookies in no time.
- Soft and Chewy Texture: The combination of butter and sugar creates a melt-in-your-mouth experience that is simply irresistible.
- Colorful Presentation: The bright sanding sugar adds a fun pop of color, making these cookies visually appealing for any event.
- Versatile Occasion: Perfect for Easter celebrations, birthday parties, or just a festive spring gathering.
- Kid-Friendly Fun: Kids love helping out in the kitchen—shaping the dough and rolling it in colorful sugar is always a hit!
Tools and Preparation
Before diving into baking your Spring Blossom Cookies, gather your tools to make the process smooth and easy.
Essential Tools and Equipment
- Mixing bowl
- Baking sheet
- Parchment paper
- Electric mixer
- Measuring cups and spoons
Importance of Each Tool
- Mixing bowl: Essential for combining ingredients evenly, ensuring a uniform cookie dough.
- Electric mixer: Makes it easy to cream butter and sugar together quickly, saving time and effort.
- Baking sheet: Provides a flat surface for baking your cookies evenly without sticking.
Ingredients
For the Cookie Dough
- 1 cup Sugar
- 3/4 cup Salted Butter, Softened
- 1 Egg
- 1 tsp Vanilla
For the Dry Mixture
- 2 1/4 cup Flour
- 1 tsp Baking Soda
Topping
- Bright Colored Sanding Sugar
- 24 Hershey Kisses, Unwrapped
How to Make Spring Blossom Cookies
Step 1: Preheat the Oven
Preheat your oven to 375 degrees Fahrenheit. Line a baking sheet with parchment paper and set it aside.
Step 2: Prepare the Kisses
Unwrap all 24 Hershey Kisses so they are ready to place on your cookies once they come out of the oven.
Step 3: Cream the Ingredients
In a mixing bowl, beat together:
1. Sugar
2. Softened butter
3. Egg
4. Vanilla
Continue mixing until well combined.
Step 4: Combine Dry Ingredients
In another bowl, combine:
1. Flour
2. Baking soda
Stir until mixed thoroughly.
Step 5: Form the Dough
Gradually pour the dry mixture into the creamed mixture. Beat together until you have formed a soft cookie dough.
Step 6: Shape the Cookies
Shape the dough into 1-inch balls. Roll each ball in bright colored sanding sugar before placing them on the prepared baking sheet.
Step 7: Bake the Cookies
Bake your cookies in the preheated oven for about 7 minutes or until they are lightly golden.
Step 8: Add Hershey Kisses
As soon as you remove the cookies from the oven, gently press an unwrapped Hershey Kiss into the center of each cookie.
Step 9: Cool Completely
Allow your cookies to cool completely on the baking sheet so that the Kisses can set before serving.
Enjoy making these delightful Spring Blossom Cookies! They are sure to be a hit at any gathering!
How to Serve Spring Blossom Cookies
Spring Blossom Cookies are not only delightful on their own, but they also pair wonderfully with a variety of serving ideas. Whether you’re hosting a spring gathering or celebrating a birthday, these cookies can be enjoyed in many creative ways.
With Milk
- A classic pairing! Serve your cookies with a cold glass of milk for a nostalgic treat that everyone will love.
On Dessert Platters
- Arrange the cookies on colorful platters with other spring-themed treats to create an inviting dessert spread perfect for any celebration.
As Party Favors
- Package individual cookies in clear bags tied with bright ribbons. This makes for a cheerful party favor that guests can take home.
With Ice Cream
- Top each cookie with a scoop of vanilla or strawberry ice cream to create an indulgent dessert. The warm cookie and cold ice cream make for a delightful combination.
At Easter Brunch
- Serve these cookies alongside your Easter brunch offerings as a sweet addition to the table. They are sure to attract both kids and adults!
How to Perfect Spring Blossom Cookies
To ensure your Spring Blossom Cookies turn out perfectly every time, follow these helpful tips.
- Use Softened Butter: Make sure your butter is softened but not melted. This will help create the perfect creamy texture needed for the dough.
- Don’t Overmix: Once you combine the wet and dry ingredients, mix just until combined. Overmixing can lead to tough cookies.
- Chill the Dough: If time allows, chill the dough for about 30 minutes before baking. Chilling helps the flavors meld and prevents spreading during baking.
- Watch Baking Time: Keep an eye on your cookies while they bake. They should be slightly golden at the edges but soft in the center when removed from the oven.
- Use Fresh Ingredients: Ensure your baking soda is fresh for optimal rise and texture in your cookies.
- Customize Toppings: Feel free to use different types of candies or sprinkles instead of Kisses and sanding sugar for unique variations!
Best Side Dishes for Spring Blossom Cookies
Adding side dishes can enhance your Spring Blossom Cookie experience. Here are some great options to complement this delightful treat:
- Fruit Salad: A refreshing mix of seasonal fruits adds a light and healthy contrast to the sweetness of the cookies.
- Cheese Platter: Include a variety of cheeses like brie, cheddar, and goat cheese paired with crackers for a savory touch against the sugary cookies.
- Mini Quiches: These bite-sized delights offer savory goodness that balances out the sweetness from the cookies, making them perfect for brunches.
- Veggie Tray: Fresh vegetables with dip provide crunch and color, creating an appealing contrast next to sweet treats.
- Chocolate Fondue: Set up a chocolate fondue station where guests can dip fruits, marshmallows, and even pieces of cookie!
- Pasta Salad: A light pasta salad tossed with seasonal veggies complements the sweetness of Spring Blossom Cookies beautifully while adding heartiness to your spread.
Common Mistakes to Avoid
Making Spring Blossom Cookies can be a delightful experience, but there are common pitfalls to watch out for.
- Bold Ingredients: Skipping ingredients or using incorrect measurements can ruin your cookies. Always double-check your ingredient list before starting.
- Bold Butter Temperature: Using cold butter instead of softened butter affects the texture. Make sure your butter is at room temperature for the best results.
- Bold Overmixing Dough: Overmixing can lead to tough cookies. Mix just until combined for soft and chewy treats.
- Bold Baking Time: Baking too long can dry out your cookies. Keep an eye on them and remove them from the oven once they are lightly golden.
- Bold Cooling Time: Not allowing cookies to cool completely can lead to melted Kisses. Let them cool so that the chocolate sets perfectly.
Storage & Reheating Instructions
Refrigerator Storage
- Store in an airtight container for up to 1 week.
- For maximum freshness, place parchment paper between layers of cookies.
Freezing Spring Blossom Cookies
- Freeze cookies in a single layer on a baking sheet before transferring to an airtight container.
- These cookies can be frozen for up to 3 months.
Reheating Spring Blossom Cookies
- Bold Oven: Preheat the oven to 350°F and warm cookies for about 5 minutes.
- Bold Microwave: Heat one cookie at a time for about 10-15 seconds on low power.
- Bold Stovetop: Place a cookie in a non-stick pan over low heat for about 1 minute, covered.
Frequently Asked Questions
Here are some common questions about making Spring Blossom Cookies.
Can I use different types of chocolate instead of Kisses?
Yes, you can use chopped chocolate or other candies. Just ensure they melt well.
How do I make my Spring Blossom Cookies more colorful?
You can add food coloring to the dough or use various colors of sanding sugar for decoration.
What if I don’t have sanding sugar?
You can substitute regular granulated sugar or leave them plain. They will still taste delicious!
Can I make these cookies gluten-free?
Yes, you can use a gluten-free flour blend instead of regular flour for gluten-free Spring Blossom Cookies.
Final Thoughts
Spring Blossom Cookies are not only visually appealing but also incredibly versatile. Their soft, chewy texture makes them perfect for any occasion, from Easter celebrations to birthday parties. Feel free to customize them with different toppings or flavors to suit your taste!
Spring Blossom Cookies

Spring Blossom Cookies are a delightful treat that embodies the spirit of spring with their soft, chewy texture and colorful presentation. Topped with a sweet Hershey Kiss and rolled in vibrant sanding sugar, these cookies are perfect for any festive occasion, from Easter celebrations to birthday parties. With just 10 minutes of prep time and simple ingredients, you can easily whip up a batch that will bring joy to your family and friends. Whether enjoyed on their own or paired with ice cream or milk, these cheerful cookies are sure to be a hit at any gathering!
- Prep Time: 10 minutes
- Cook Time: 7 minutes
- Total Time: 17 minutes
- Yield: Approximately 24 cookies 1x
- Category: Dessert
- Method: Baking
- Cuisine: American
Ingredients
- 1 cup Sugar
- 3/4 cup Salted Butter, Softened
- 1 Egg
- 1 tsp Vanilla
- 2 1/4 cups Flour
- 1 tsp Baking Soda
- Bright Colored Sanding Sugar
- 24 Hershey Kisses, Unwrapped
Instructions
- Preheat oven to 375°F and line a baking sheet with parchment paper.
- Unwrap the Hershey Kisses and set aside.
- In a mixing bowl, cream together sugar, softened butter, egg, and vanilla until well combined.
- In another bowl, whisk together flour and baking soda.
- Gradually mix the dry ingredients into the wet mixture until a soft dough forms.
- Shape dough into 1-inch balls and roll each ball in sanding sugar before placing on the baking sheet.
- Bake for about 7 minutes until lightly golden.
- Press an unwrapped Hershey Kiss into the center of each cookie immediately after removing from the oven.
- Allow cookies to cool completely on the baking sheet.
Nutrition
- Serving Size: 1 cookie (28g)
- Calories: 120
- Sugar: 9g
- Sodium: 60mg
- Fat: 6g
- Saturated Fat: 3g
- Unsaturated Fat: 2g
- Trans Fat: 0g
- Carbohydrates: 15g
- Fiber: <1g
- Protein: 1g
- Cholesterol: 15mg